useful for navigating the vast Minecraft world, especially when you’re exploring or building in new areas. They show terrain, biomes, and any features you’ve discovered, making them valuable for long-term exploration and base-building.
Types of Maps
Before creating a map, it’s important to understand the different types of maps available in Minecraft:
- Empty Map: A blank canvas that records the area around the player as they explore.
- Item Frames: You can place maps in item frames for decoration or as a way to display your explored areas.
- Maps in Adventure Mode: In Adventure Mode, maps can be used to guide players on specific quests or adventures created by map-makers.
Step-by-Step Guide to Creating a Map
Step 1: Gather Materials
To create a basic map in Minecraft, you will need the following materials:
- Paper: You can craft paper from sugarcane. Each sugarcane yields three pieces of paper.
- Compass: A compass is crafted using four iron ingots and one redstone dust.
Crafting the Compass
- Mine Iron Ore: First, you need to mine iron ore and smelt it in a furnace to get iron ingots.
- Collect Redstone Dust: You can find redstone dust by mining redstone ore, typically found below level 16 in the Overworld.
- Craft the Compass: Open your crafting table and place the redstone dust in the center and the iron ingots around it.
Step 2: Crafting the Map
Once you have the compass and paper, you can create your map:
- Open the Crafting Table: Right-click (Java Edition) or tap the crafting table (Bedrock Edition) to access the crafting interface.
- Arrange the Materials: Place the compass in the center of the crafting grid and surround it with eight pieces of paper.
- Collect the Map: Once the materials are arranged correctly, you’ll see the map in the result box. Drag it into your inventory.
Step 3: Using the Map
Now that you have your map, it’s time to use it:
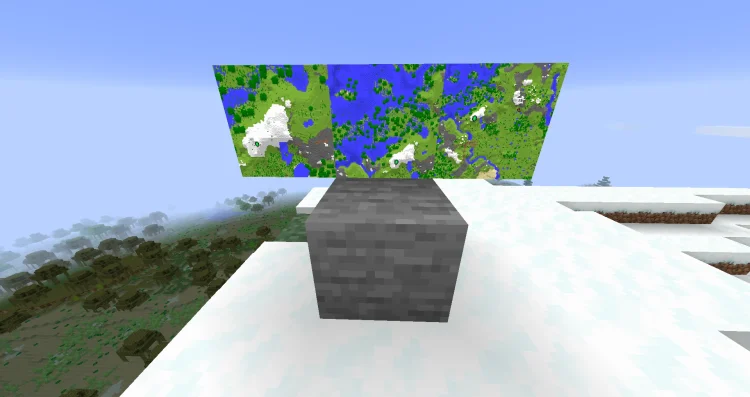
- Equip the Map: Place the map in your hotbar and right-click (or tap) to hold it in your hand.
- Explore the World: As you move around, the map will automatically update to show the terrain you explore. The area you have not yet explored will appear blank on the map.
Step 4: Expanding Your Map
If you want to cover more ground with your map, you can expand it. Here’s how:
- Crafting Additional Maps: Create additional maps using the same process and explore new areas.
- Combining Maps: To combine maps, you will need to craft them in a specific way. Start with a map that you want to expand and place it in the crafting table alongside paper.
Enhancing Your Map
Now that you know how to create a basic map, let’s look at ways to enhance it for better exploration and navigation.
1. Map Markers
You can create visual markers on your map to highlight important locations:
- Beacons: Build a beacon tower and place a beacon on top. Beacons emit light that can be seen from a distance and will appear on your map as a marker.
- Item Frames: Place your maps in item frames on walls in your base to create a detailed overview of the areas you’ve explored.
2. Color Coding
Use different colored banners or other markers in the world to help differentiate locations on your map:
- Banners: Craft banners using different dyes and place them in important locations. When you look at the map, the banner will appear as a colored marker.
- Colored Wool or Blocks: Place colored blocks in different areas as landmarks.
3. Annotations
If you’re creating an adventure map or a detailed exploration map, consider adding annotations:
- Signs: Place signs near landmarks or important locations, giving a brief description or name.
- Text in the Map: Although you cannot directly annotate the map itself, you can document your adventures in a book and quill, or take screenshots to remember locations.
Tips for Advanced Map Makers
For players interested in creating more complex maps, there are several advanced techniques to consider:
1. Using Command Blocks
If you’re comfortable with commands, you can use command blocks to create dynamic elements in your maps:
- Teleportation Points: Set up command blocks that teleport players to different areas.
- Weather Changes: Create command blocks that change the weather or time of day based on player actions.
2. Adventure Maps
Creating adventure maps involves scripting specific events and creating challenges for players. Here’s a brief overview:
- Set Objectives: Design clear objectives for players, such as quests, puzzles, or battles.
- Create a Storyline: Write a compelling story that guides players through the map.
- Testing: Have friends test your map to ensure everything works as intended.
3. Using Resource Packs
Enhance the visual appearance of your maps using resource packs:
- Custom Textures: Create or download resource packs that change the appearance of blocks, items, and entities to match your map’s theme.
- Custom Sounds: Add custom sounds to enhance the atmosphere of your map.
Sharing Your Map
Once you’ve created your map, you might want to share it with others:
- Exporting the Map: Locate your world save folder and find the specific world you created your map in. Copy the world folder to share it with friends.
- Using Map Platforms: Upload your map to platforms like Planet Minecraft or Minecraft Maps for others to download and play.
Conclusion
Creating a map in Minecraft is a fantastic way to document your adventures and share your creations with others. Whether you’re exploring new territories or crafting intricate adventure maps, the possibilities are nearly limitless. By gathering the right materials, utilizing enhancements, and considering advanced techniques, you can create maps that are not only functional but also visually appealing and engaging. So grab your compass, explore the vast world, and start crafting your own Minecraft maps today! Happy crafting!